LG GSA-H55N Datenblatt
Stöbern Sie online oder laden Sie Datenblatt nach Optische Laufwerke LG GSA-H55N herunter. LG GSA-H55N Datasheet Benutzerhandbuch
- Seite / 4
- Inhaltsverzeichnis
- LESEZEICHEN
Inhaltsverzeichnis
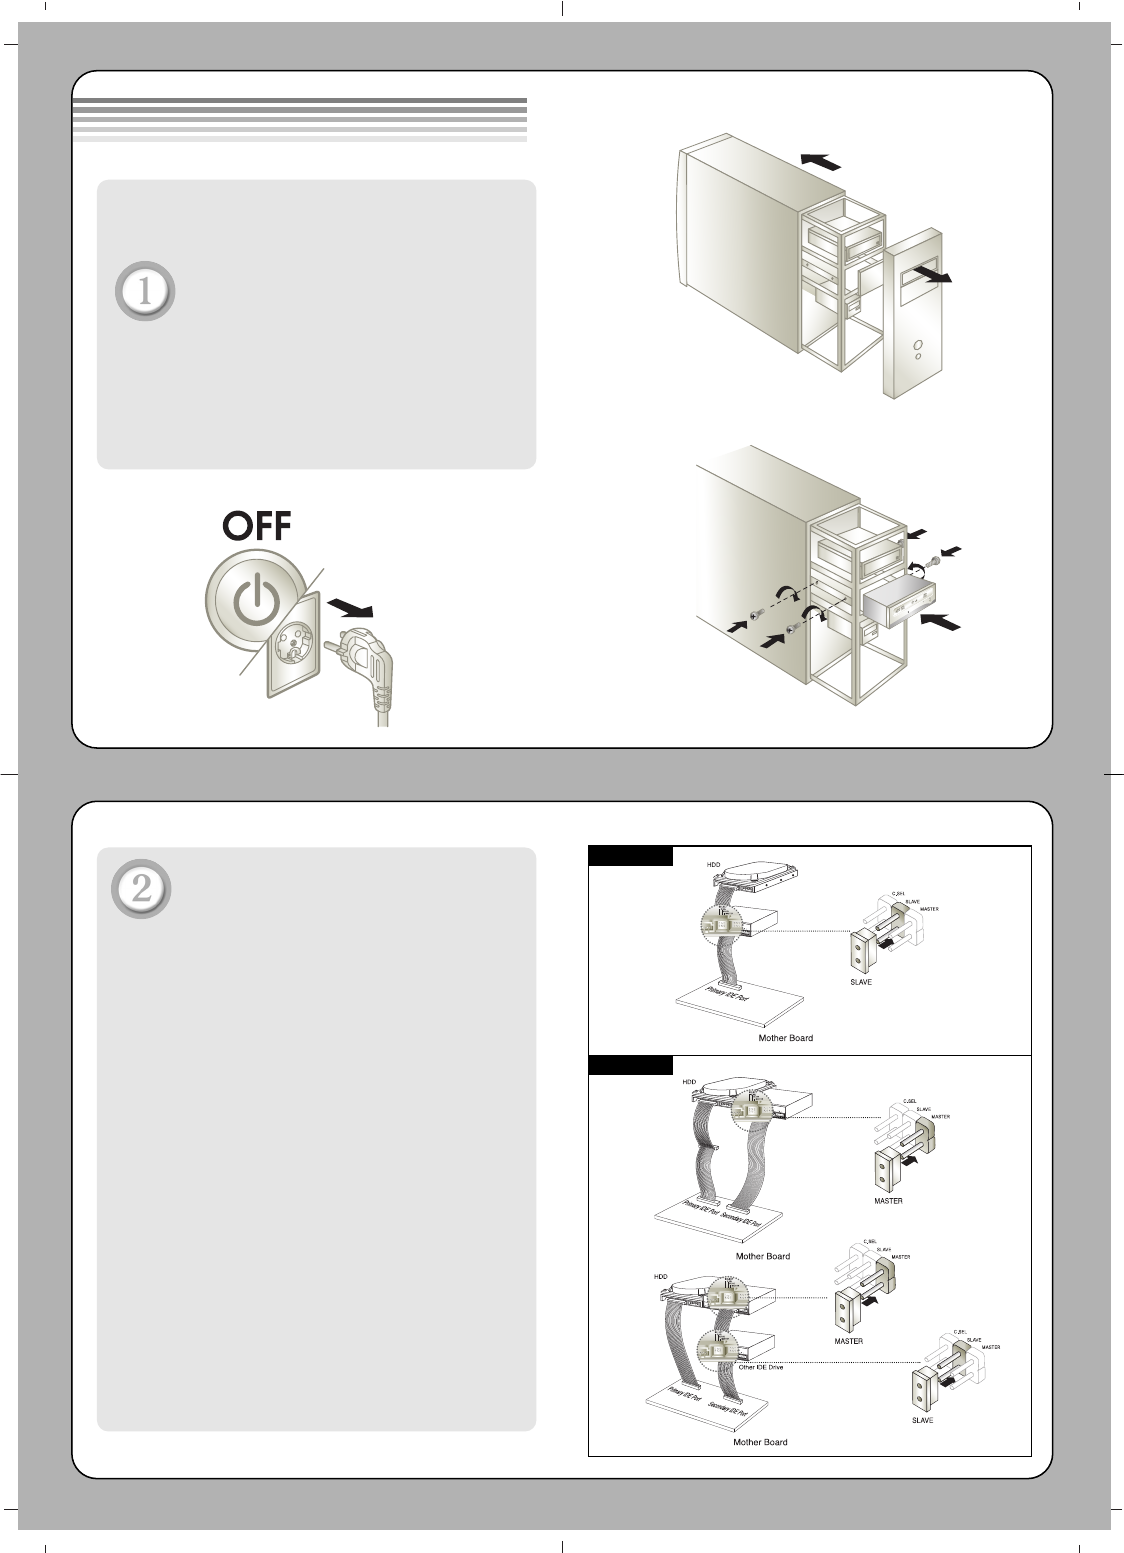
Before installing the drive, turn offthe system power.Disconnect the power cord,and remove the cover.• Remove a vacant 5.25” drive bay panel fromthe c
Connect the IDE datacable/DC power cable to the drive.❶ Connect the IDE data cable to the back ofthe drive.* Using a 40-pin IDE cable might bring the
Features• Enhanced-IDE (ATAPI) interface.• Power tray loading and ejection of disc. (The disc can also be ejected manually.)• Combination CD-R/RW,
Safety InstructionsCe produit a été fabriqué conformément aux prescriptions EEC DIRECTIVE89/336/EEC, 93/68/EEC et 2006/95/EC.Questo prodotto risponde
Verwandte Produkte und Handbücher für Optische Laufwerke LG GSA-H55N
 (15 Seiten)
(1 Seiten)
(15 Seiten)
(15 Seiten)
(1 Seiten)
(15 Seiten)
 (15 Seiten)
 (4 Seiten) (13 Seiten)
(14 Seiten)
(13 Seiten)
(4 Seiten) (13 Seiten)
(14 Seiten)
(13 Seiten)
© 2020, manymanuals.de. Alle Rechte vorbehalten. | 0.672 s |
 Manymanuals.com
 Manymanuals.de
 Manymanuals.fr
 Manymanuals.it
 Manymanuals.pl
 Manymanuals.cz
 Manymanuals.es
 Manymanuals-pt.com
Kommentare zu diesen Handbüchern